
Tired of going through Qualtrics' interface to re-pull your survey's latest data? Track responses live in Google Sheets instead!
Qualtrics is a powerful tool that can be used for a variety of functions: research surveys, performance reviews, internal or public-facing forms, event registration and RSVPs, and so much more. However, it can be very annoying having to log in, find your project, go to the 'Data & Analysis' tab, then re-download your data for the 27th time, all just to see the latest responses.
Fortunately, there is a much more convenient solution that is easy for anyone to set up! How about we send the responses directly to a Google sheet?!
Connecting Qualtrics to Google Sheets via 'Workflow'
For every project, Qualtrics offers a 'Workflow' tab that enables users to set up some pretty nifty automations. An 'event' can trigger a 'task' to make your life a whole lot easier. The most common (and useful) event trigger is a new submission. Once a new submission is received, we can set up the 'Google Sheets' task to send that submission's data to a Google Sheet!
1. Set up your Google Sheet
Before setting up the workflow in Qualtrics, create your Google Sheet and fill in the first row with all of your desired column headings based on your Qualtrics survey/project's questions. These headings will be auto-recognized by Qualtrics later on for easy mapping.
PRO TIP
It's always a good idea to record the submission date! So adding 'Submission date' as your first column heading is highly recommended.

2. Set up the Qualtrics Workflow
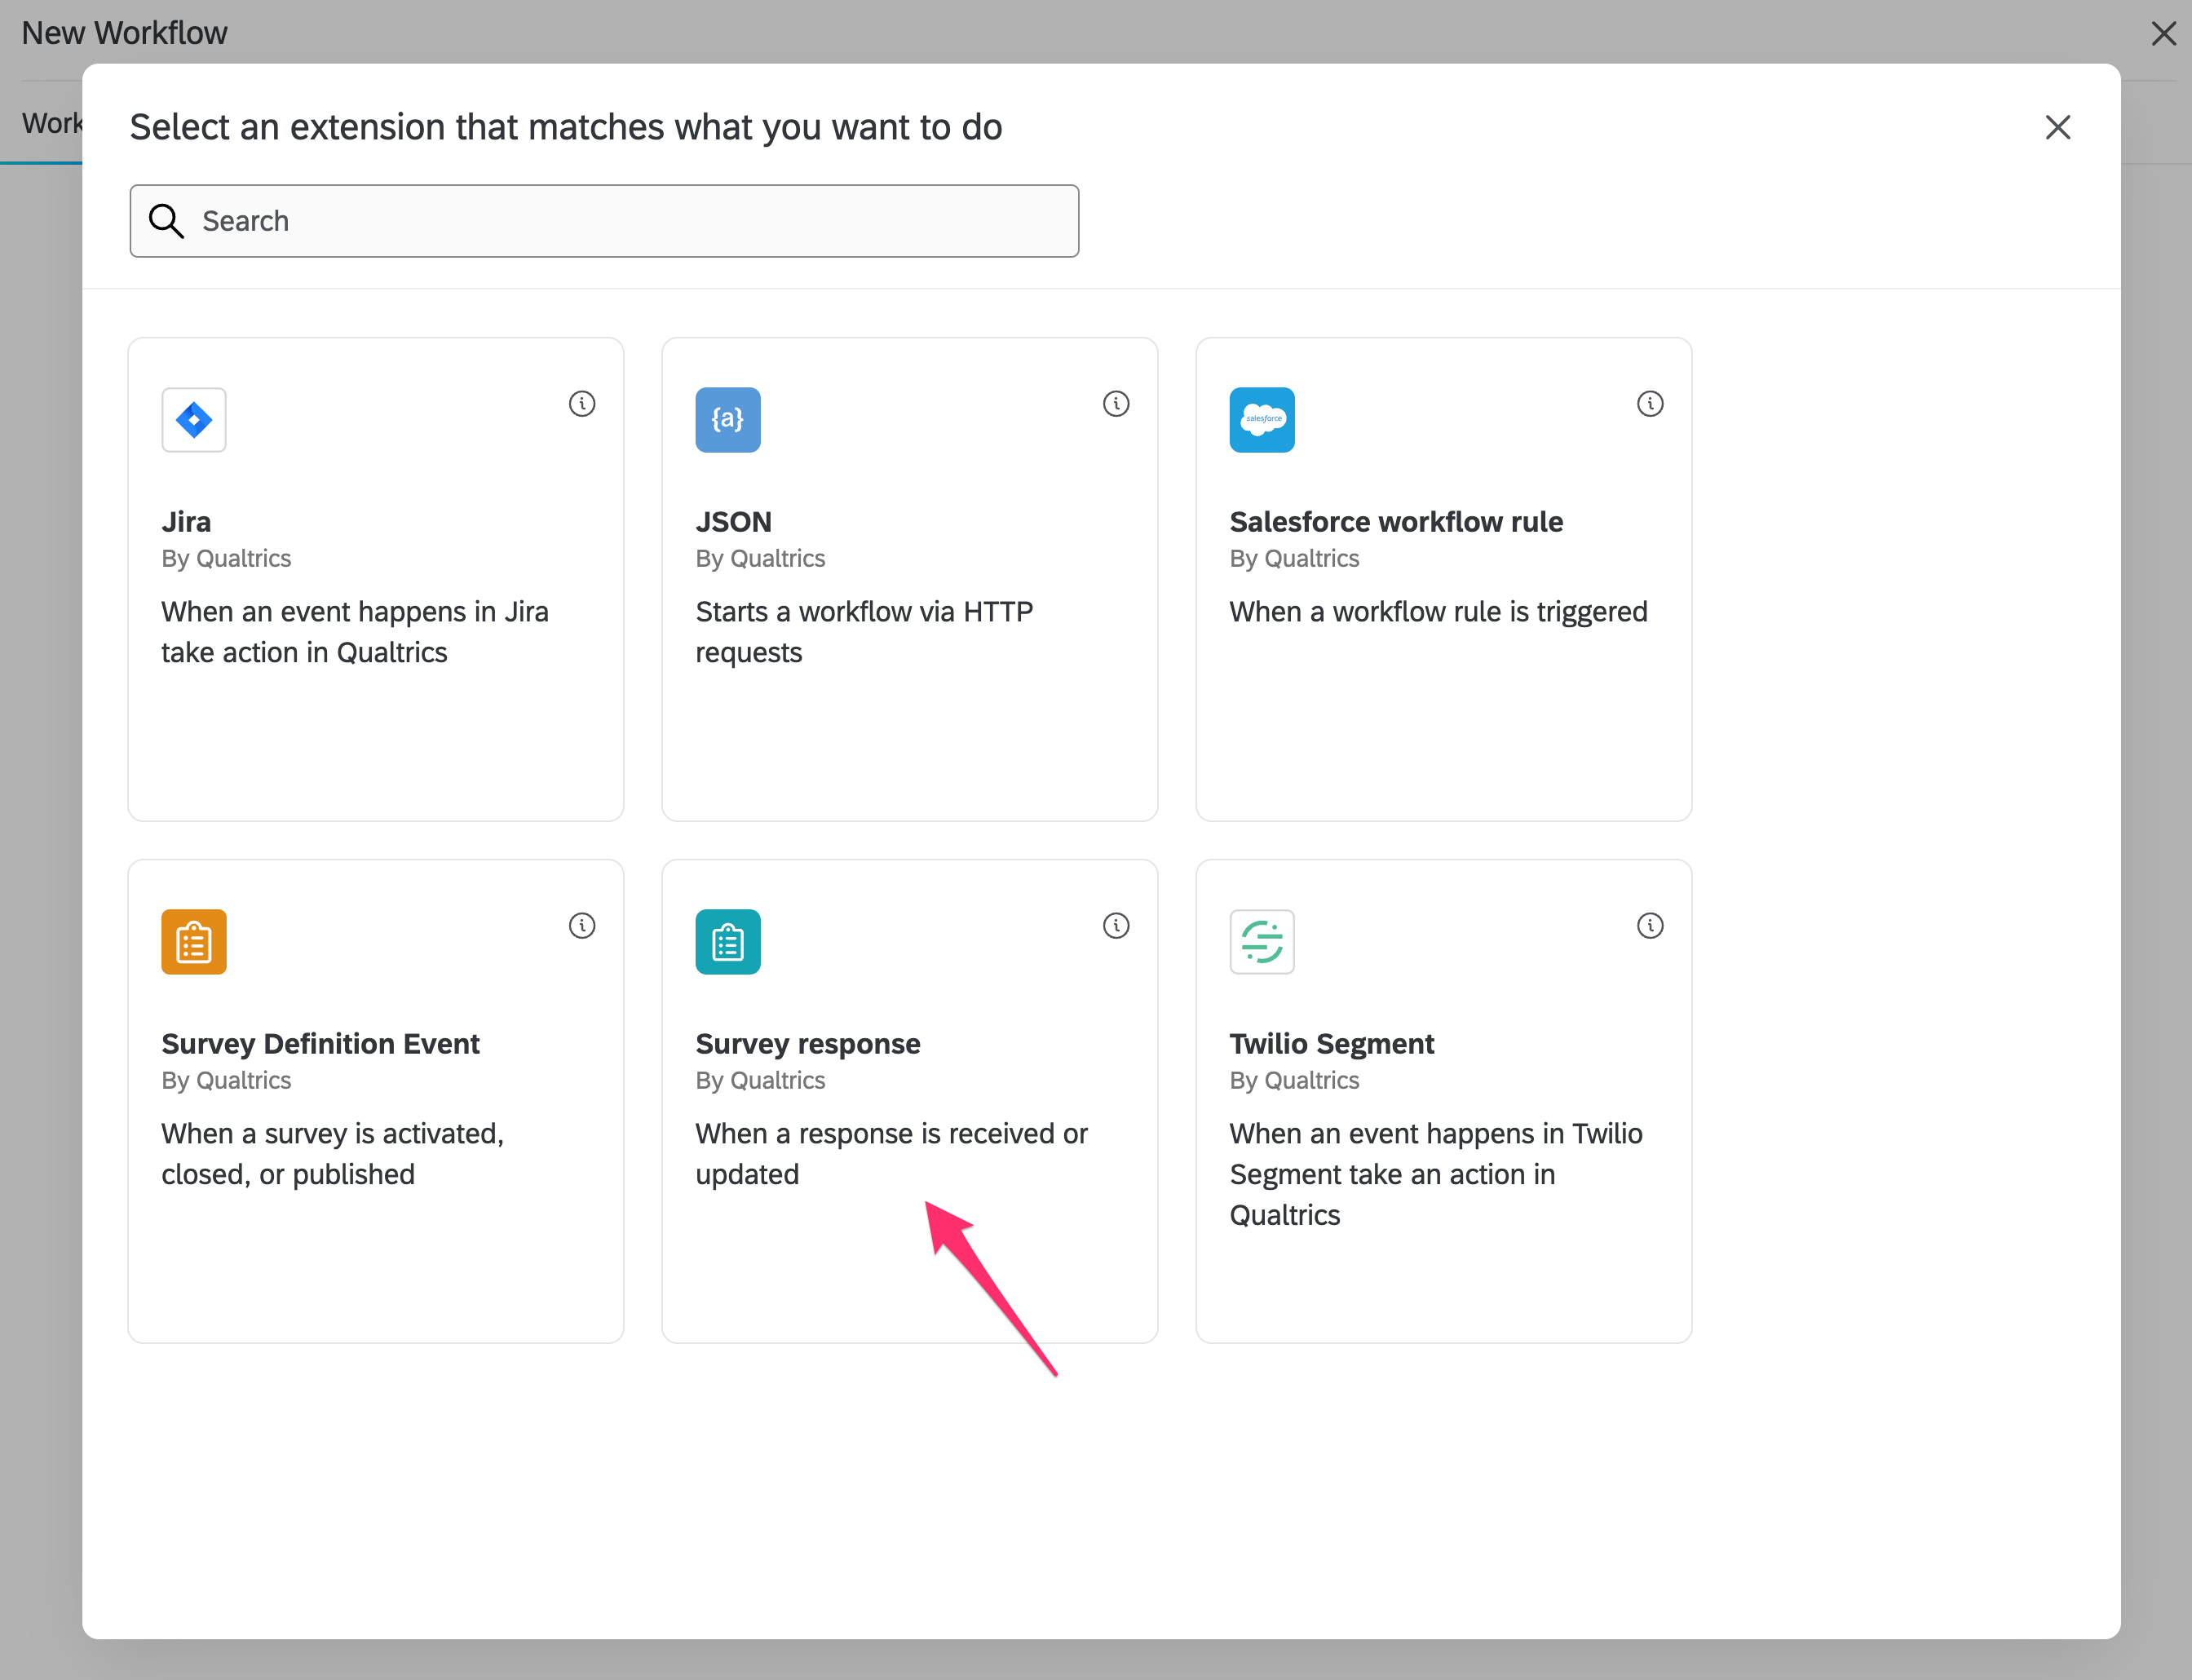
Once your survey/project is finished (AKA ready to launch!) and the Google Sheet has been set up, head on over to your Qualtrics project and click the "Workflow" tab. From there, click "Create a workflow" and select the "Started when an event is received" option.

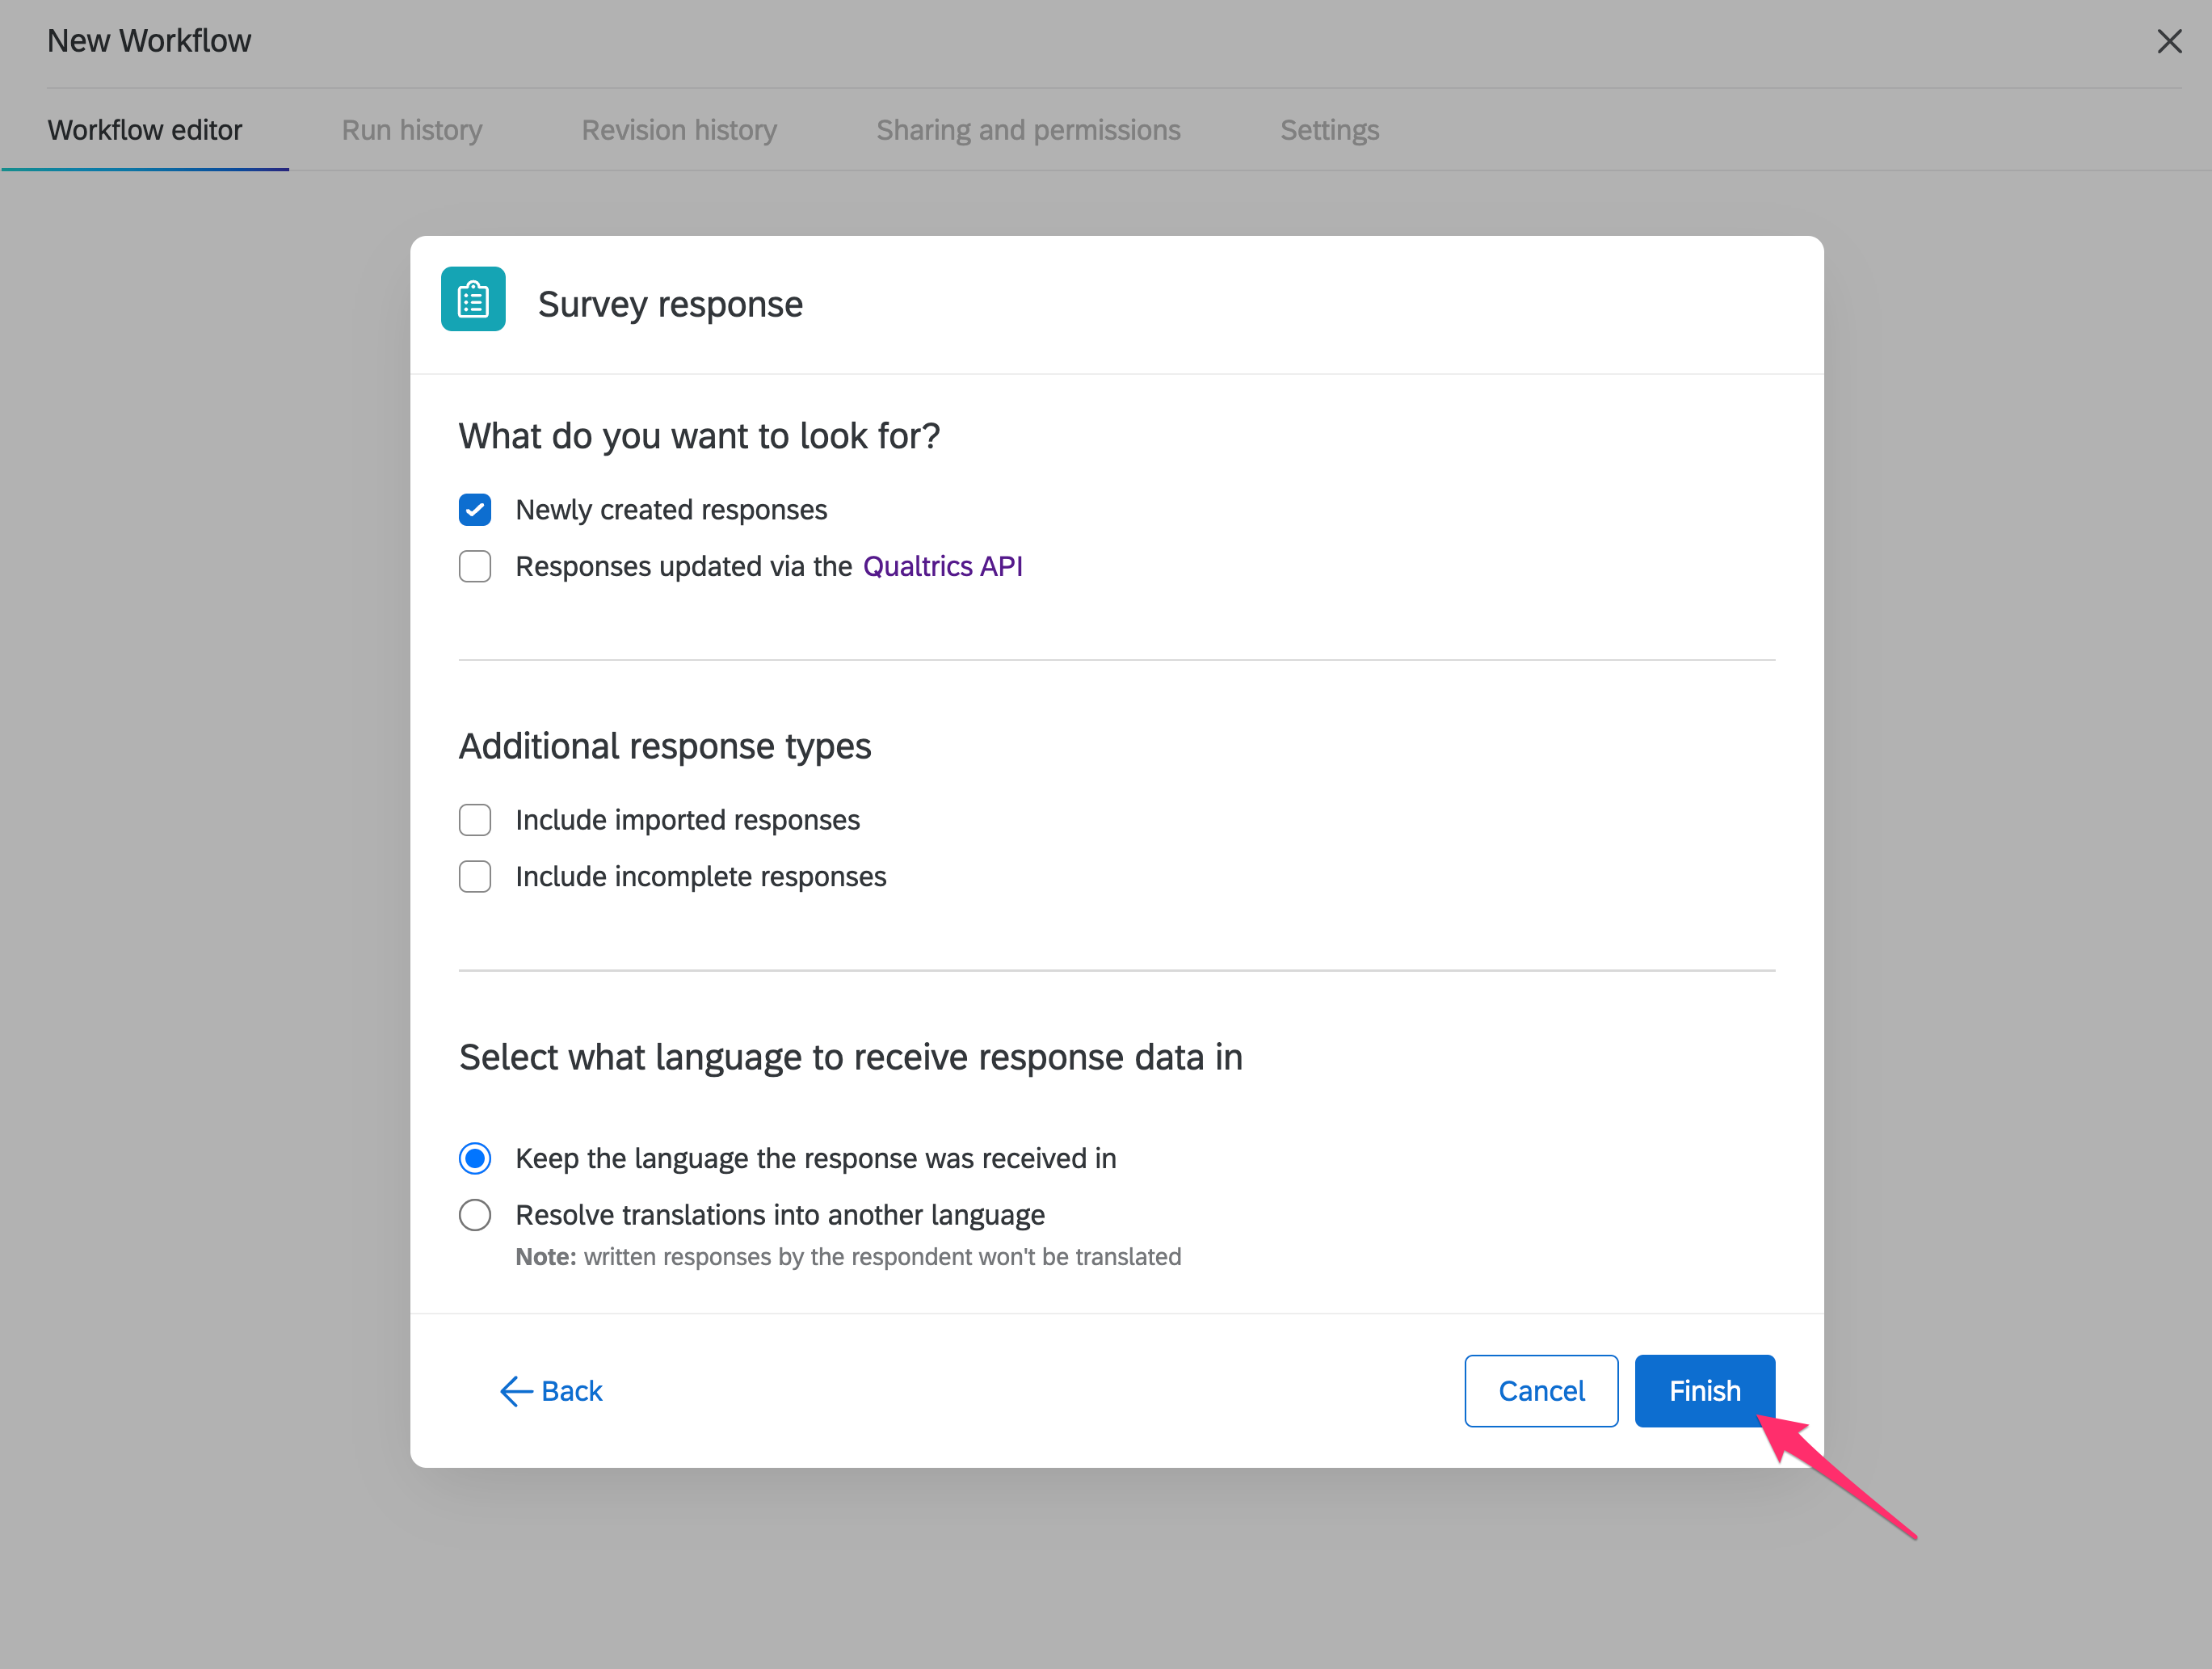
You'll be presented with several options. Select the "Survey response" tile to set a new survey response as the workflow's trigger. On the next screen, click "Finish" (default settings are fine, no edits needed).
3. Set up the Workflow Task
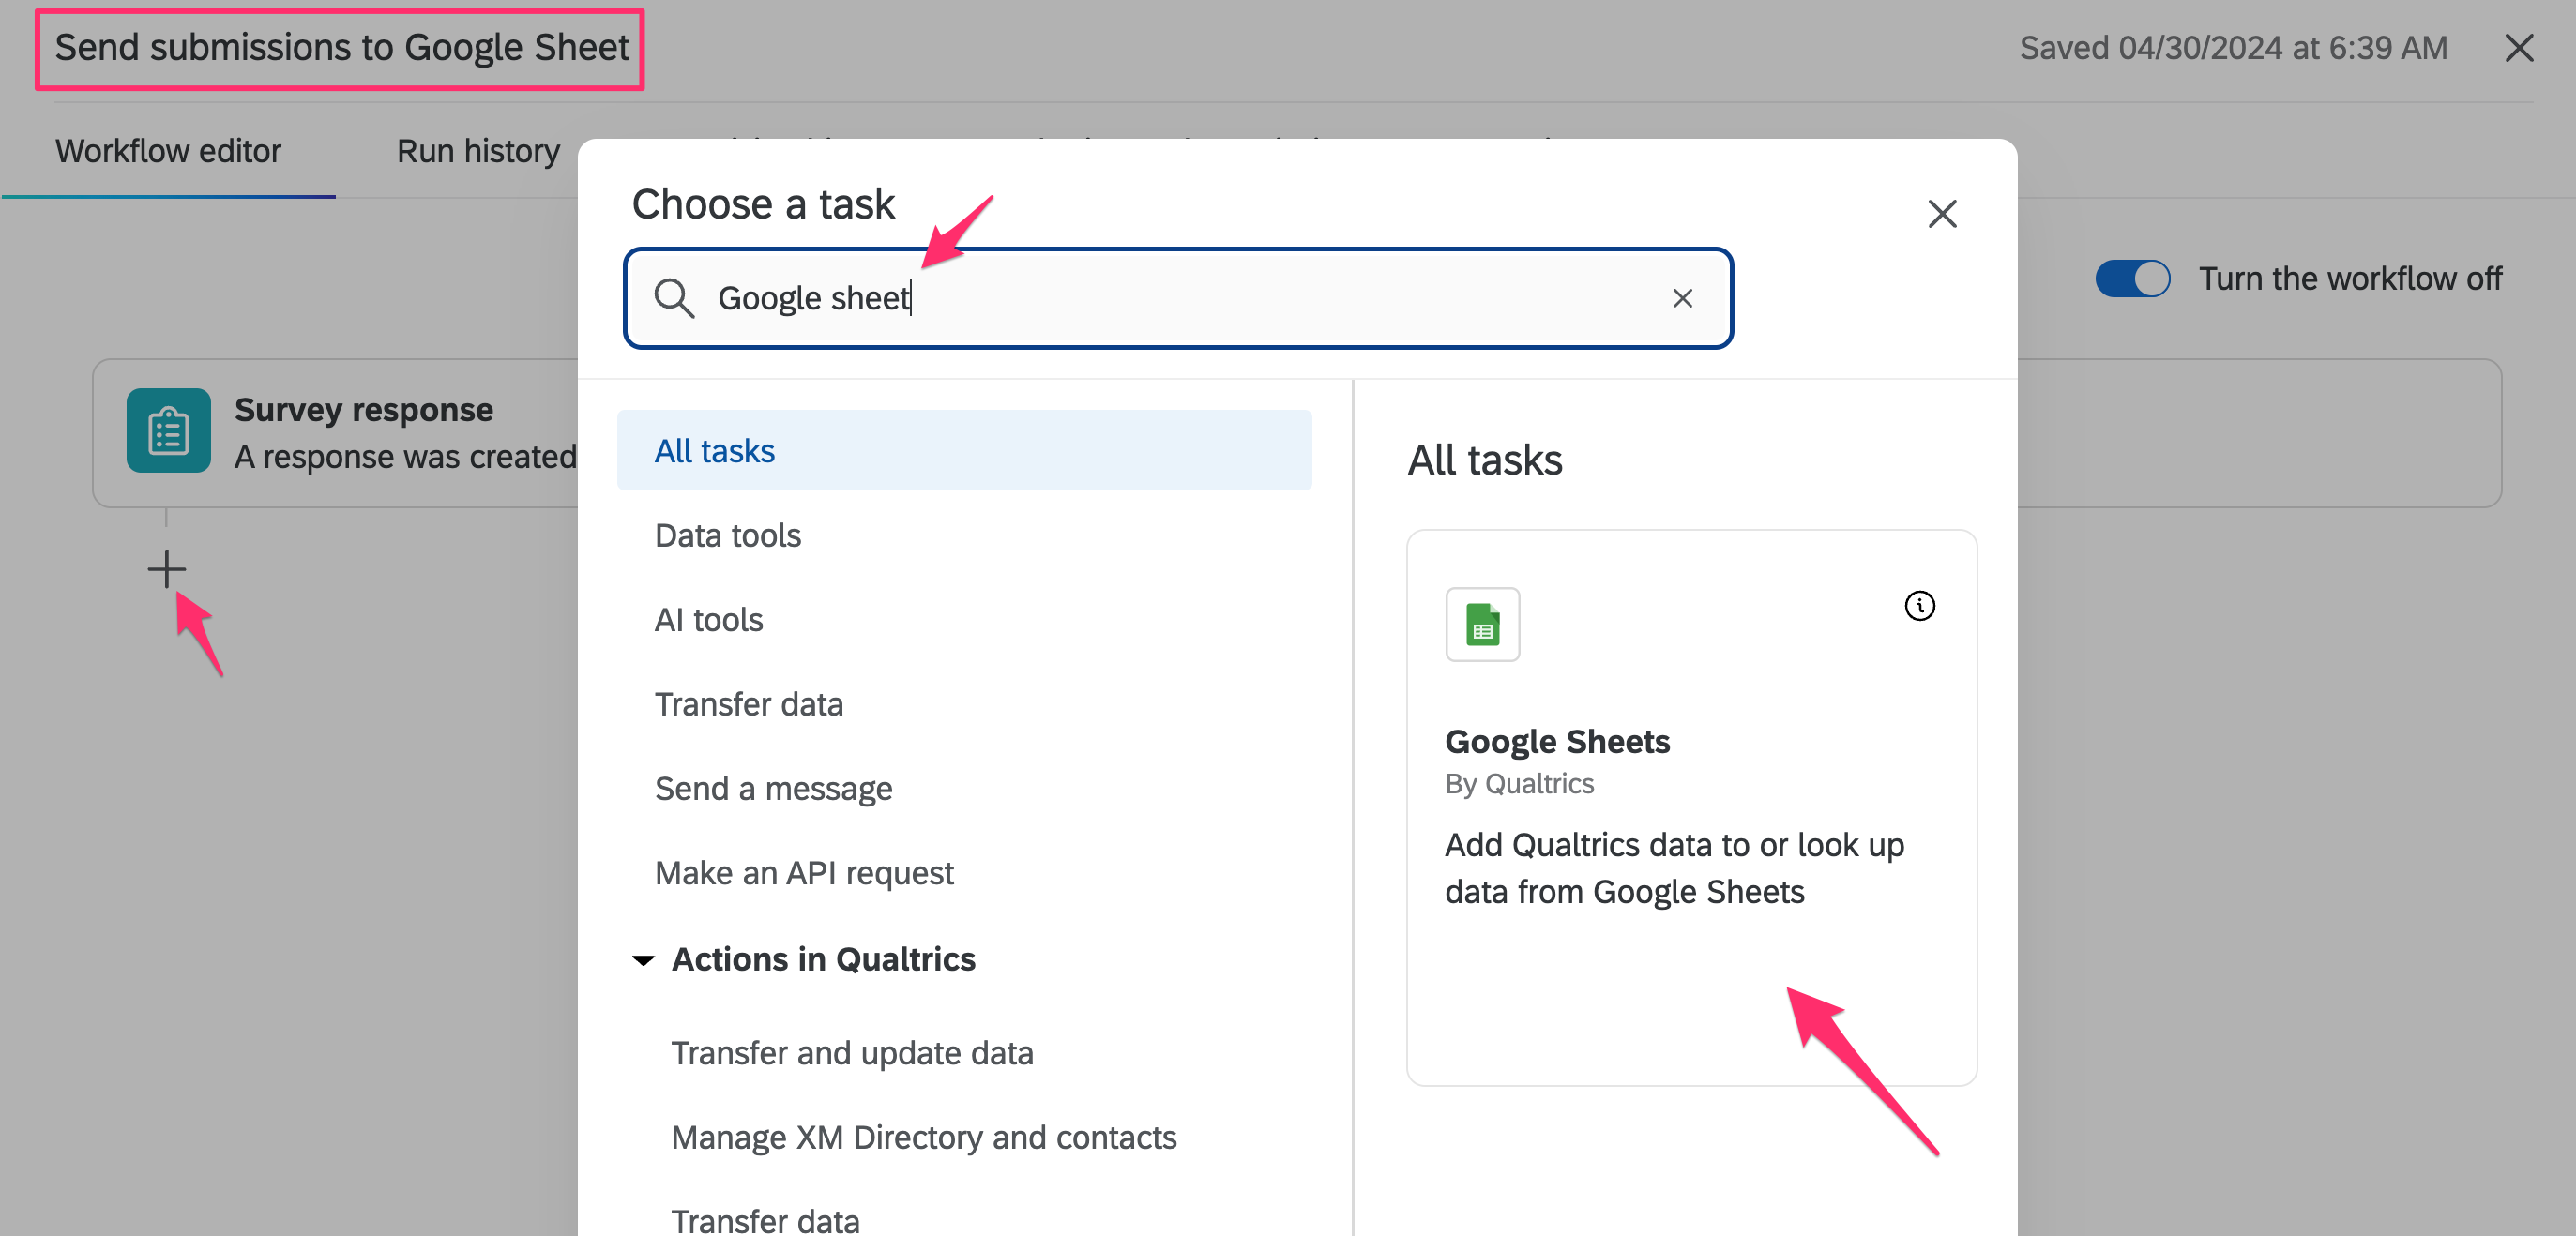
Yay! The workflow is created! And right now it does -- well, absolutely nothing! You'll notice by default the workflow is named "New Workflow" and automatically turned on. For best practice, name this workflow something like "Send submissions to Google Sheet".
Adding the Task
Now, to set up the task, click the plus sign (+) below the survey response trigger and select "Add a task". You'll be presented with even more options this time, so search for "Google Sheets" and it should come right up. Once selected, click the "Add a row to a Google Sheet" on the next screen and hit next.
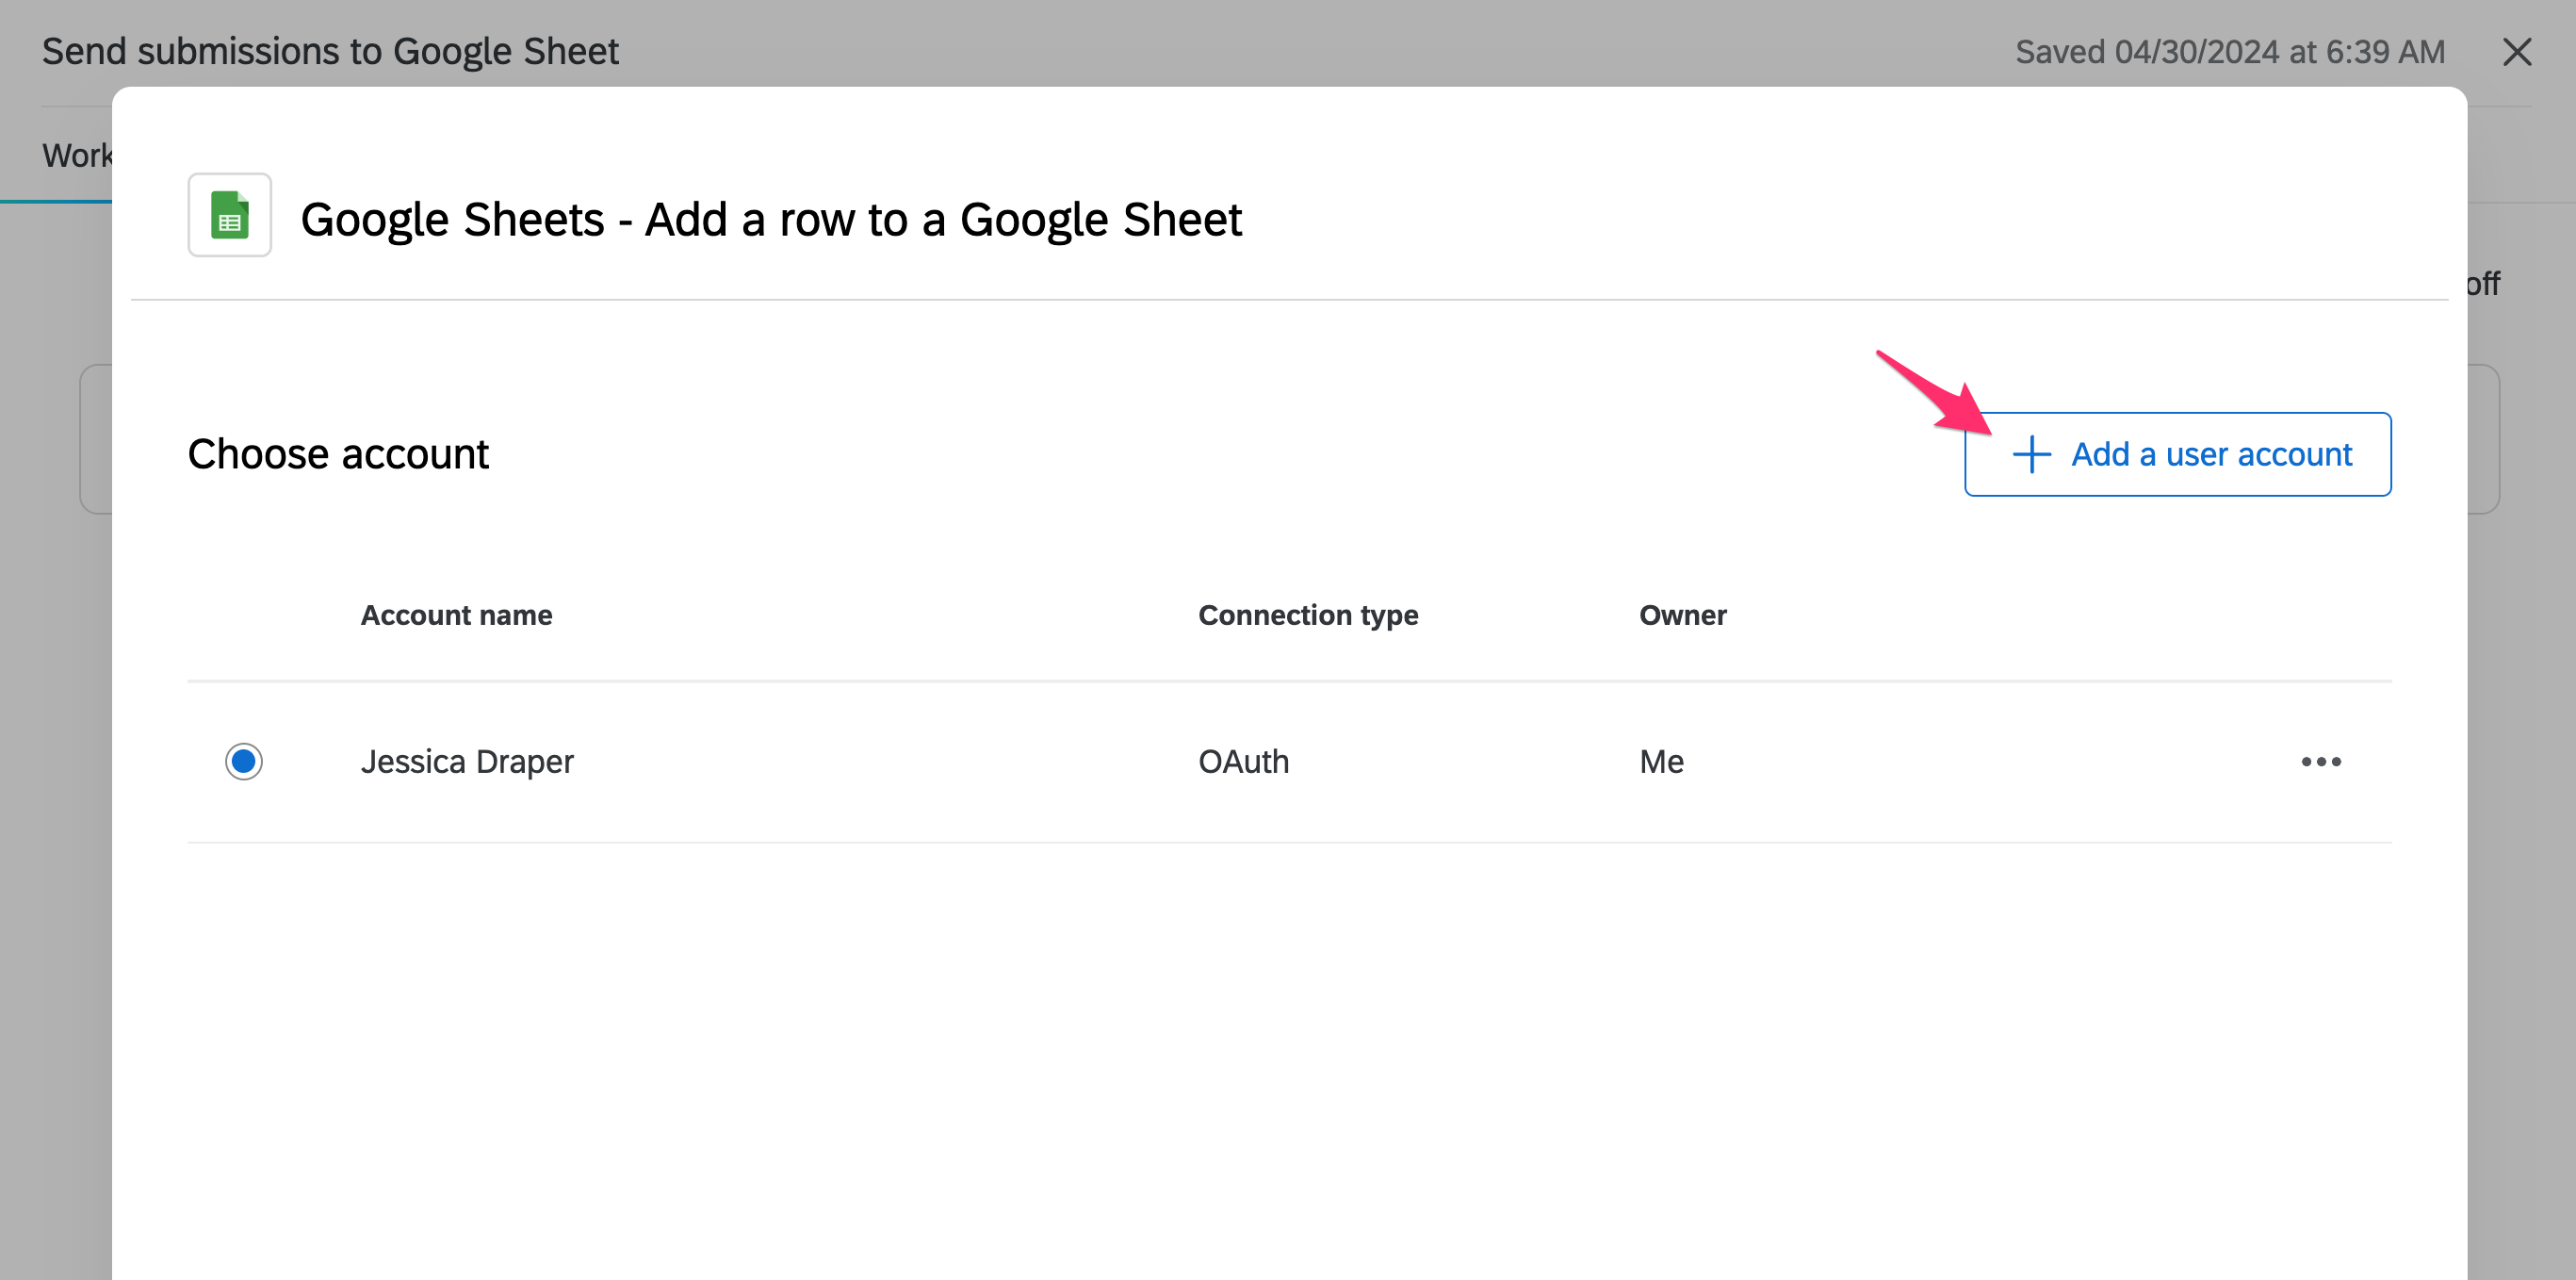
At this point, you'll need to connect your Google account to Qualtrics. Select "Add a user account", give it a name (your name, for example), then click "Connect account". A new page will open to select the Google account to connect with. Choose your personal @arizona.edu account or a shared account if appropriate (most importantly, whichever Google account you created the Google sheet in). Click "Continue" on the next screen to allow access.
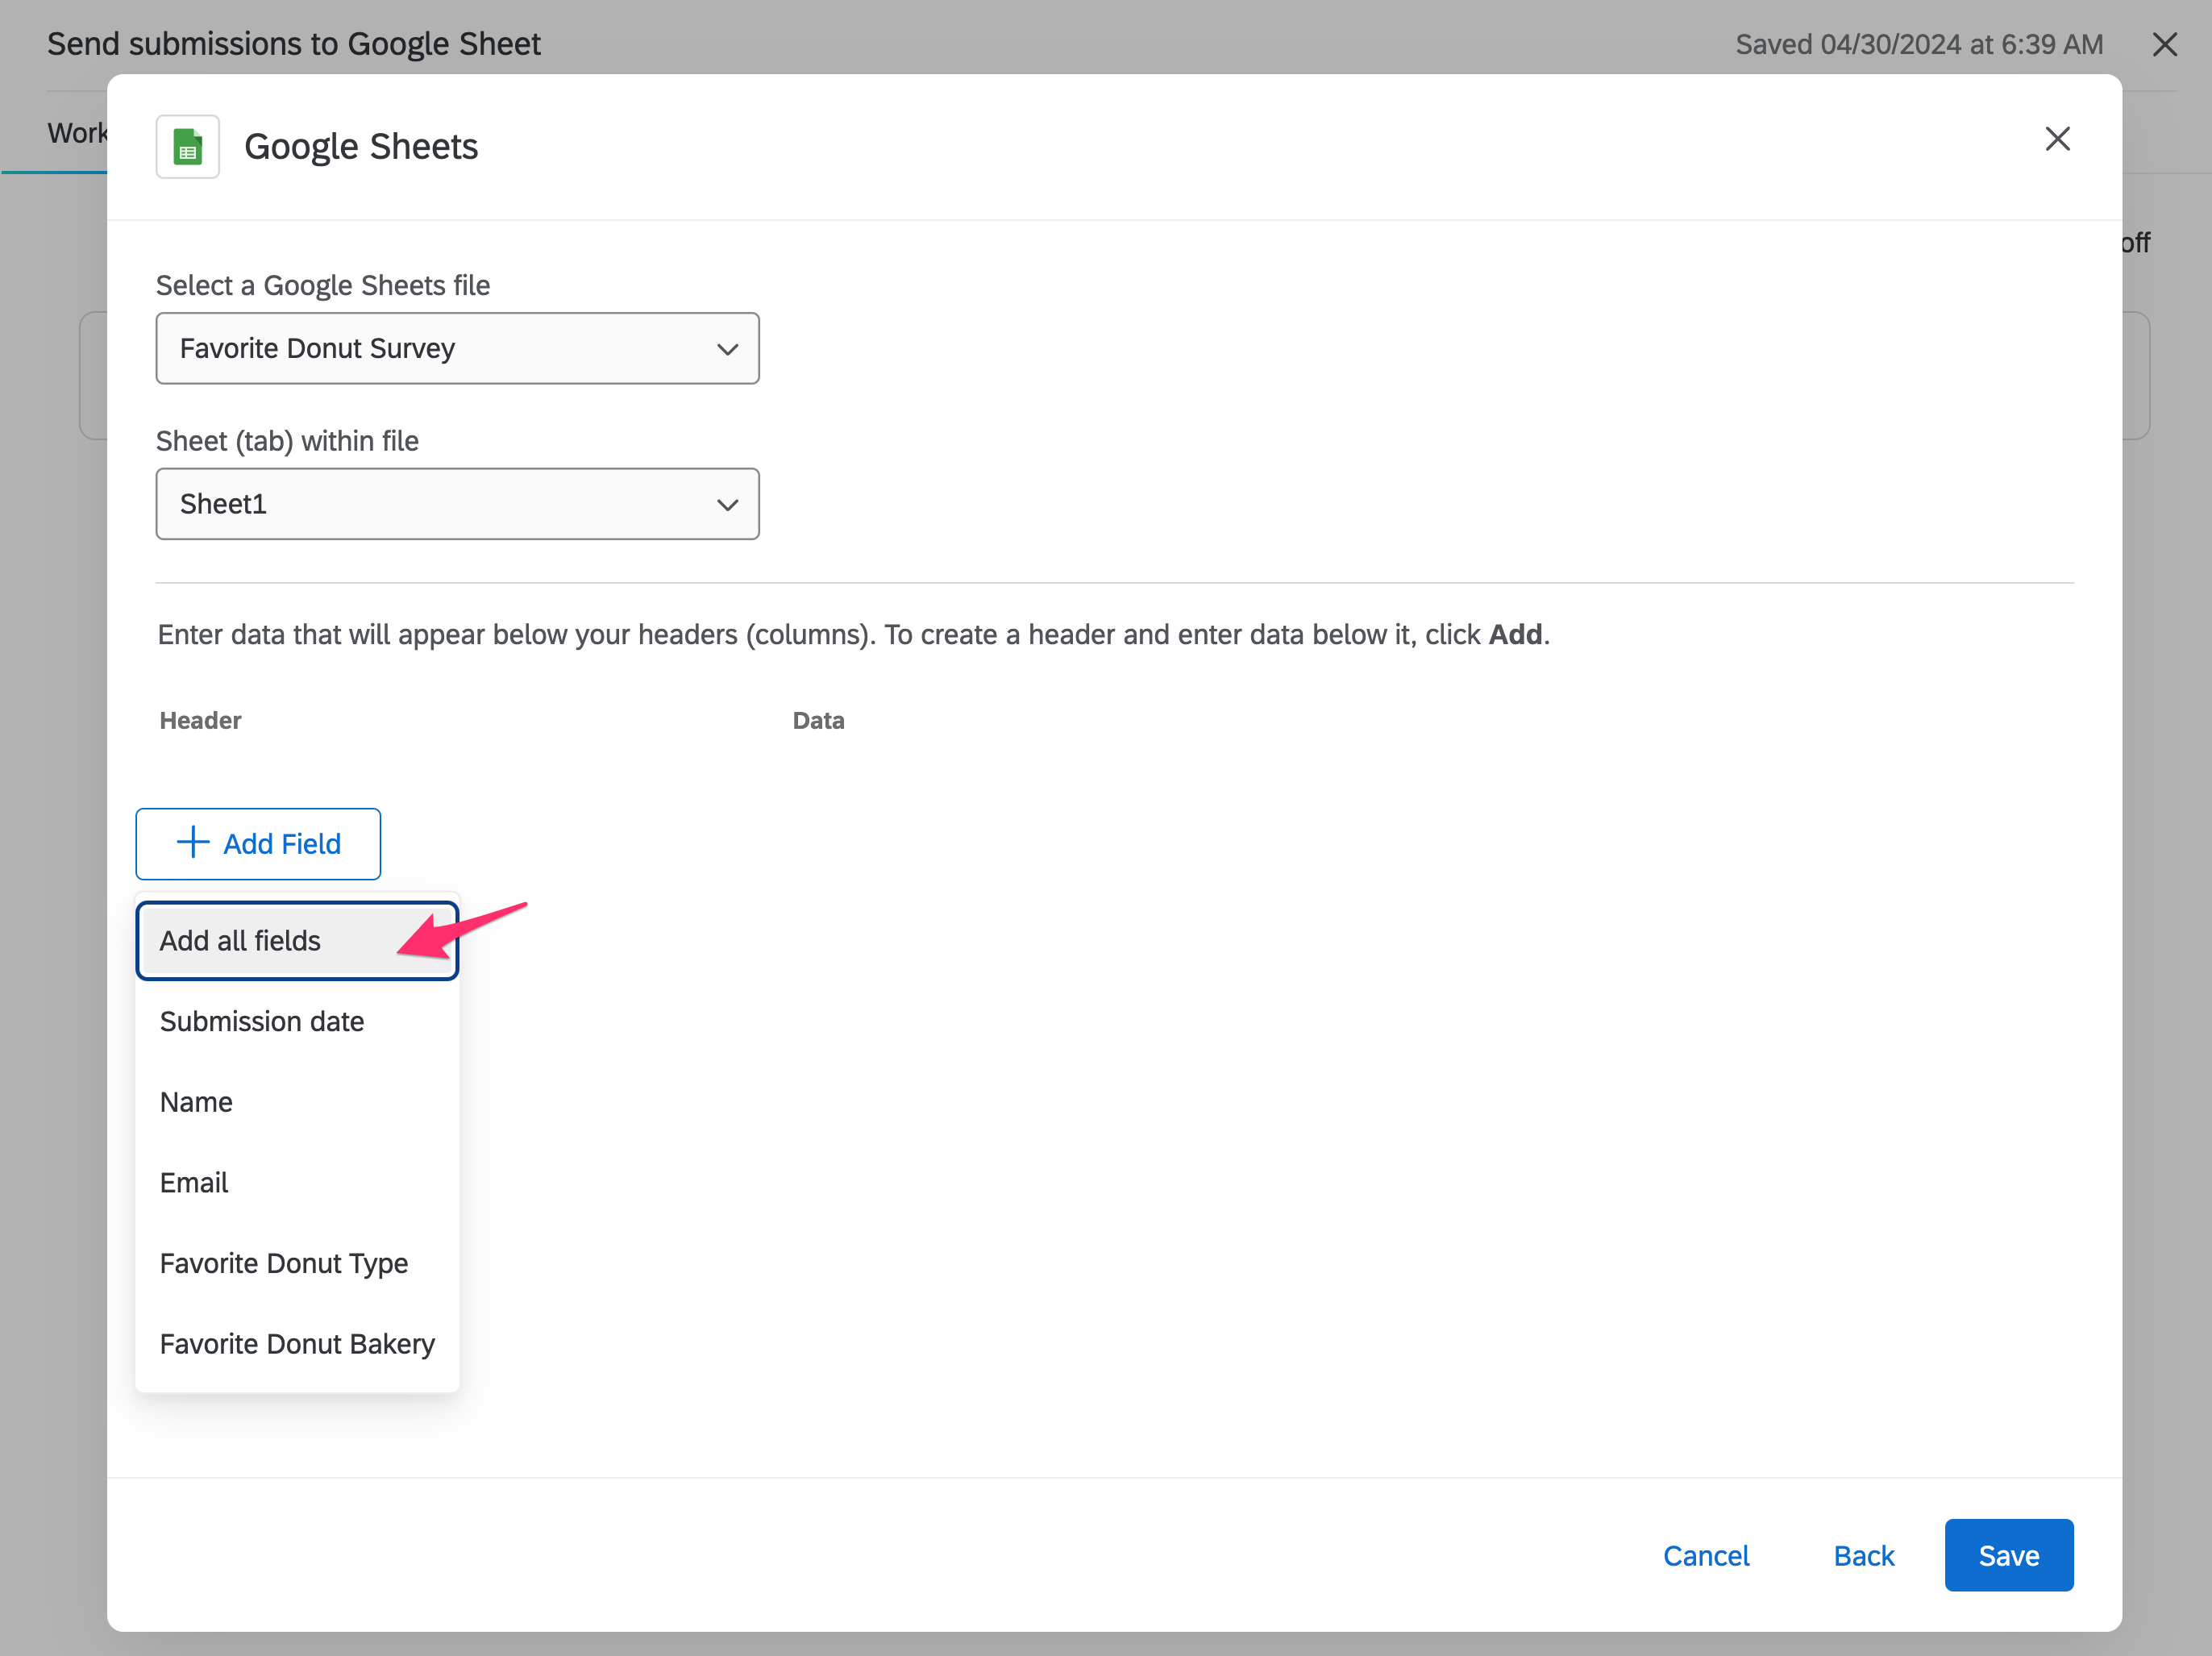
With the new user account selected, hit "Next". Qualtrics will now populate the dropdown with all Google Sheets associated with the connected account. Search for the one you just set up and select the corresponding sheet name. You will then see two blank columns for "Header" and "Data" -- this is where the mapping fun begins!
Mapping the Columns
To bulk add all the columns you created in your sheet, click "Add Field" (you should see all your headings from the sheet populate in the dropdown already) and then select "Add all fields". The left "Header" side corresponds to the Google Sheet columns while the right "Data" side corresponds to your Qualtrics responses.
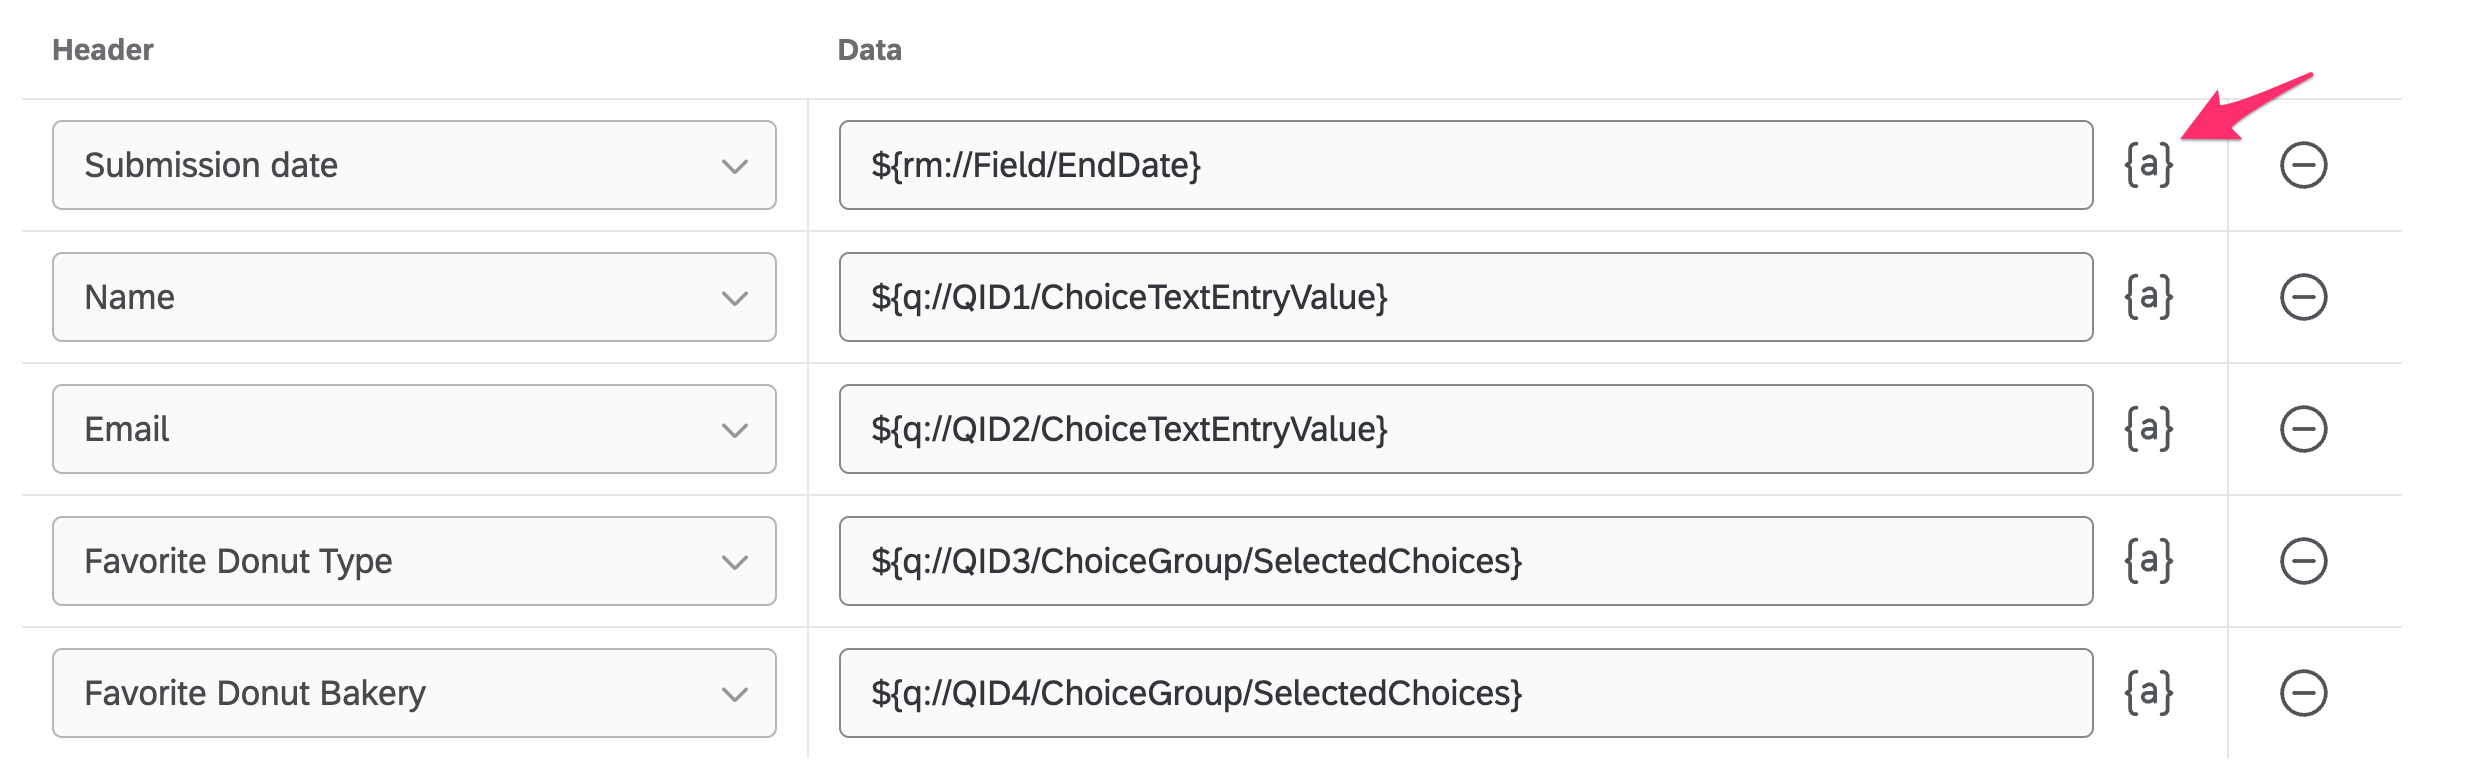
Using the "{a}" button, you can now map each header to a specific survey question response, embedded data field, or other data associated with the survey/project.
- For Submission date, the data value you'll want to use is under Response > End date
- For text based responses, you'll want to navigate to the right question under Survey Question and choose the actual question (e.g. "What is your name?") -- NOT "Question Text"
- For multiple choice based responses, you'll want to navigate to the right question under Survey Question and (likely) scroll down to choose "Selected Choices" -- this will be the value of what the respondent actually selected.
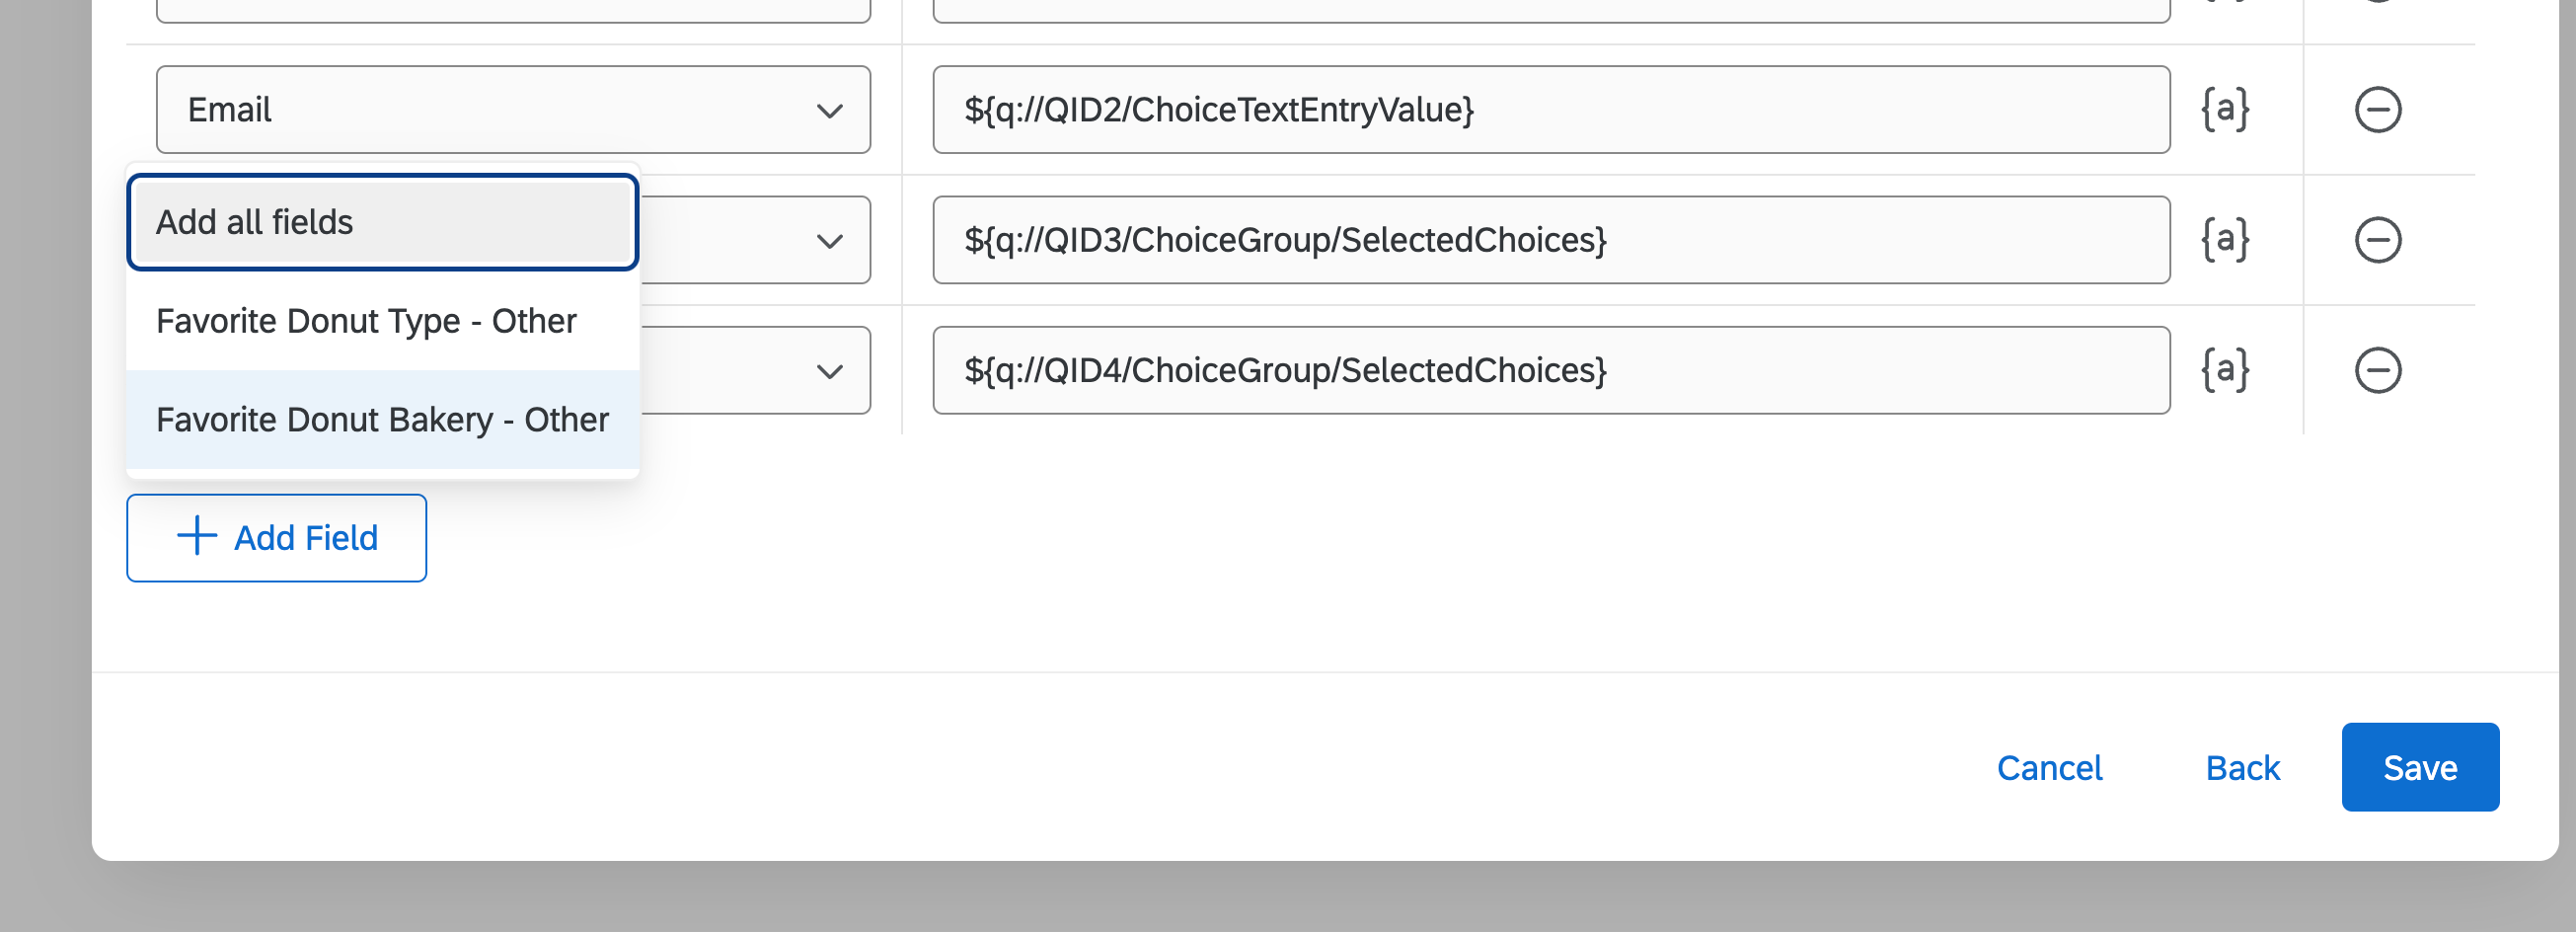
- For open text entries within questions, you'll want to navigate to the right question under Survey Question and (likely) scroll down to choose the option appended with "(Text Entry)"
- Other question types may have other options to grab the respondent's actual answer. Reach out to COH-IT if you have questions, or experiment with trial and error!
Adding New Columns
There may be cases where you forgot to add a column you need in the Google Sheet. For instance, if you include an "Open Text Entry" option for an "Other"-type question, you may want to collect that text response separately.
To add a new column and mapping after-the-fact, first save what you have already. Go back to the Google Sheet and add the new column heading(s) where you'd like. Click the "Google Sheets" task to open the mapping and click "Add Field" to see the new column(s) you just added in the Google Sheet. Select the new column (or hit "Add all fields" for adding more than one) and set the data appropriately.
NOTE
The order of columns in the mapping table doesn't really matter; however, the more you can add all fields at once, the more it will be consistent with the order set in your Google Sheet.
4. Testing Testing Testing
After saving the mapping settings, you're all set! You can start submitting your project and seeing the results come in automatically into the Google Sheet. It is super important to submit a few test submissions that answer different scenarios so you can make sure all mappings are set correctly. You'll have some manual work ahead of you if you have to test and fix mapping errors once the survey/project is live and receiving real submissions.
WARNING
Qualtrics will NOT be able to auto-update the mappings if you happen to change the column name in the Google Sheet after a mapping has already been set. Qualtrics will see it as a new field that must be added and reset. If the Google Sheet is shared with other collaborators, you will want to lock those column names from being edited by others or simply warn your collaborators to not touch. :-)
And with just a few minutes of setup time, you can bypass Qualtrics entirely when checking on your survey/project submissions. You can do other cool things like creating a new tab that summarizes your results based on specific questions for live counts and tracking at a glance...perhaps a blog post for another time! Until then, enjoy the extra time you've saved by not logging into Qualtrics!